Heat transfer vinyl (HTV) is a game-changer when it comes to adding personalized designs to fabrics using your Cricut machine. With HTV, you can create custom t-shirts, tote bags, and more, infusing your projects with your unique style. In this comprehensive guide, I’ll share tips and techniques to help you master the art of working with HTV and achieve professional-looking results with your Cricut.
Weeding: Taming the Vinyl Beast

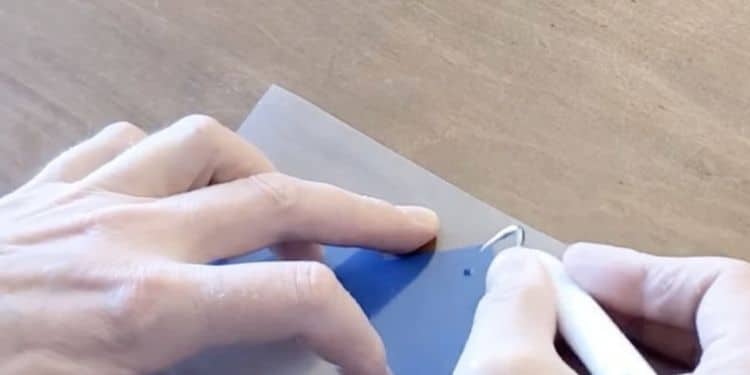
Weeding is the process of removing the excess vinyl from your design before transferring it onto your fabric. Use weeding tools, such as hooks or tweezers, to carefully remove the unwanted parts. Take your time and be patient to ensure that your design remains intact and the fine details are preserved.
Iron-on or Heat Press: Choosing Your Heat Application Method

When it comes to applying HTV, you have two main options: using an iron or a heat press. Iron is a more accessible and budget-friendly choice, while a heat press offers precise temperature and pressure control. Whichever method you choose, make sure to apply even pressure and heat to ensure a strong bond between the vinyl and the fabric.
Carrier Sheet: Protecting Your Design

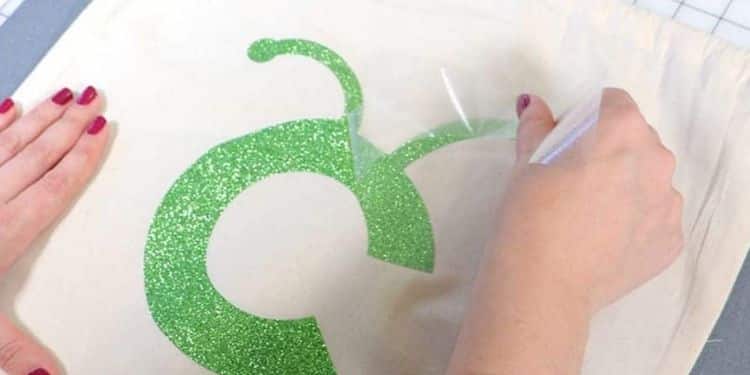
The carrier sheet is the clear plastic backing that holds your SVG cut design in place. It protects the vinyl during the cutting and weeding process and ensures proper alignment during application. When using HTV, make sure to keep the carrier sheet intact until you’re ready to apply the design to your fabric.
Matte or Glossy Finish: Choosing the Right Look
HTV comes in both matte and glossy finishes, each offering a unique aesthetic appeal. A Matte finish provides a subtle and sophisticated look, while a glossy finish adds a vibrant and reflective shine to your designs. Consider the style and purpose of your project to determine which finish will best complement your overall vision.
Substrate: Matching HTV to the Right Fabric
The fabric you choose, also known as the substrate, plays a crucial role in the success of your HTV project. Ensure that the fabric is suitable for heat application and can withstand the recommended temperature settings. Cotton, polyester, and cotton-poly blends are commonly used fabrics for HTV projects.
Preheat: Priming Your Fabric for Success
Before applying the HTV, it’s essential to preheat your fabric using an iron or heat press. Preheating removes moisture, wrinkles, and chemicals from the fabric, creating a smooth surface for the HTV to adhere to. Follow the recommended preheat instructions specific to your HTV brand for optimal results.
Temperature and Time Settings: The Key to a Successful Transfer
The proper temperature and time settings are critical for achieving a durable and long-lasting HTV application. Refer to the manufacturer’s guidelines for the recommended temperature range and duration based on the type of HTV and fabric you’re using. Test a small area or spare piece of fabric before applying HTV to your main project to ensure the settings are suitable.
Application: Pressing with Precision
When applying HTV, place your design onto the fabric, ensuring it’s correctly aligned. Use even pressure and follow the recommended temperature and time settings. Apply the heat evenly to the entire design area, moving the iron or heat press in a consistent motion. Once the application is complete, allow the vinyl to cool before removing the carrier sheet.
Peel Hot or Peel Cold: Which Works Best?
After applying the heat, you can either peel the carrier sheet while the HTV is hot for a smooth, seamless finish, or you can let it cool completely and peel the carrier sheet off the cold. The decision between peeling hot or cold depends on the specific HTV brand and the instructions provided. Follow the manufacturer’s guidelines to determine the best peeling method for your HTV.
Reverse Weeding: Unleashing the Design
Reverse weeding, also known as the “inside-out” weeding technique, is used when working with intricate or delicate designs. Instead of weeding the excess vinyl around the design, you need the design itself, leaving the surrounding vinyl intact. This technique allows you to achieve intricate designs with ease and precision.
Layering: Adding Dimension to Your Designs
Layering is the process of stacking multiple layers of HTV to create multi-color or multi-dimensional designs. When layering, cut and apply each layer separately, starting with the bottom layer and working your way up. Ensure that each layer is aligned accurately for a seamless and professional look.
Care Instructions: Ensuring Longevity
To maintain the quality and longevity of your HTV projects, it’s crucial to follow proper care instructions. Wash garments inside out, use mild detergent, and wash in cold water. Avoid bleach, fabric softeners, and harsh washing cycles. Hang or lay flat to dry, or tumble dry on low heat if needed. By following these care instructions, your HTV creations will stay vibrant and intact for a long time.
In Summary
Mastering heat transfer vinyl (HTV) with your Cricut opens up endless possibilities for creating personalized and professional-looking projects. By understanding the techniques of weeding, iron-on or heat press application, temperature and time settings, and the various finishes available, you can achieve stunning results. Experiment with different substrates, layering techniques, and care instructions to unleash your creativity and make your HTV projects truly unique. With practice and attention to detail, you’ll be able to create HTV masterpieces that impress and inspire. Happy crafting!


 No products in the cart.