Ever been curious about Exploring Layer Functionality in Brother Canvas Workspace? Well, you’re in for a treat! With today’s guide, not only will you be a step ahead in your crafting journey, but you might also have a chuckle or two along the way.
The Basics: What are Layers?

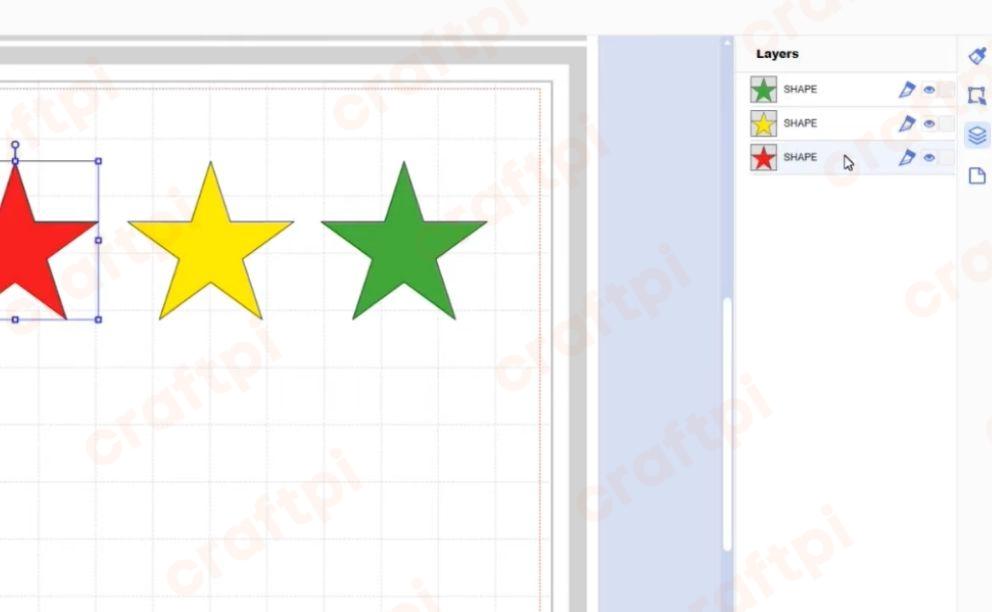
Layers in design software can be likened to transparent sheets stacked on top of each other. Each sheet (or layer) contains a piece of the design puzzle. The magic happens when they come together. Imagine making a sandwich. You wouldn’t want to slap everything onto one slice of bread, right? Layers give your design the structure it needs, one element at a time.
The Brother Canvas Workspace is no different. It uses layers to help you keep track of your design elements, making editing a breeze. Remember: in the world of design, organization is key!
But don’t just take my word for it. Let’s dive into the nitty-gritty and see these layers in action.
Advanced Techniques in Layers
Okay, so you’ve got a handle on the basic concept of layers. Now, let’s level up! Advanced layer techniques can make your designs pop in ways you’ve never imagined.
For instance, by grouping certain layers, you can manipulate them as a single unit. This is a game-changer for complex designs. Think of it as holding a bunch of grapes rather than trying to juggle each grape individually.
Another pro tip? Play around with the opacity of your layers. It’s like adding a dash of mystery to your designs. You know, like that secret ingredient in your grandma’s famous pie.
Why Layer Functionality Matters
Let’s get real for a second. Understanding layers can seem like an uphill battle, but the payoff is immense. Layers bring depth and intricacy to designs. It’s the difference between a flat drawing and a dynamic masterpiece.
Plus, mastering layer functionality means faster editing and less hair-pulling. Imagine being able to swiftly navigate through your project, pinpointing any element with ease. That’s the power of understanding layers!
Also, fun fact: the more you work with layers, the better you get at visualizing your end design. It’s like having a sixth sense for crafting. And who wouldn’t want that superpower?
Tips and Tricks
| Tip | Description |
|---|---|
| Name Your Layers | Just like you wouldn’t name all your kids “Bob”, give each layer a unique name. It’ll save you tons of confusion later on. |
| Use Shortcuts | Keyboard shortcuts can be a lifesaver. The quicker you can navigate, the more efficient you become. |
Warning: Always backup your designs before making significant changes to layers. No one likes the heartbreak of losing hours of work!
Navigating the Brother Canvas Workspace
Now that we’ve covered the foundational knowledge of layers, it’s essential to understand how the Brother Canvas Workspace itself functions. This cloud-based application is designed with crafters in mind, which means it’s user-friendly, but every tool has its nuances.
For starters, the Workspace offers a clean interface, making it intuitive for both beginners and seasoned pros. The tools are logically placed, ensuring that you don’t waste time searching for what you need. Remember the joy of finding the scissors in the first drawer you checked? It’s kind of like that.
One noteworthy feature is the ability to import various file formats seamlessly. Whether you’re working with PNG, SVG, or Brother’s proprietary FCM files, the Workspace has got you covered.
A Crafter’s Parting Words
Now that you’re armed with knowledge about layers, the canvas (pun intended!) is your oyster. Dive in, make mistakes, learn, and remember to have fun. Because at the end of the day, crafting is all about expressing yourself and enjoying the process. Layer on, my friend!


 No products in the cart.